For people who are engaged with business services, email is one of the most significant ways to make the work quick, robust, available and easily handled. In such an organization, if the email is used in a correct manner, it can eventually lead to a huge profit. It sure does helps to provide skilful and reliable communication to the customer. The service is free to use, and once we users are on the Web, there will be no further cost which will be required to be spent to send or receive the message. The webmail in the latest version is not just used for sending and receiving emails. Now there are many other features attached to the webmail, and much research had been done on which features to add by which users can complete their work from a single point. It sure was an effective and useful thought which users appreciated. Learn more on how advantageous is Bigpond Webmail from our Customer Support.
Microsoft Outlook, as we know, is one of the obstructive email and an application that can be connected to be used with Microsoft Office. There are many users out there who own the account on Outlook, and most of the users are not sure about the hidden features included in it. There are features where users can connect other email service account into Outlook. One web mail can be used to operate two different email accounts; well, isn’t it an awesome service. Learn more about the feature from Technical Care. Now Bigpond webmail supports adding the account into Microsoft Outlook. To get details information about the update, reach out to the Support Service Number.To set up users, Telstra webmail on Microsoft Outlook 2019 follow the given steps down below.
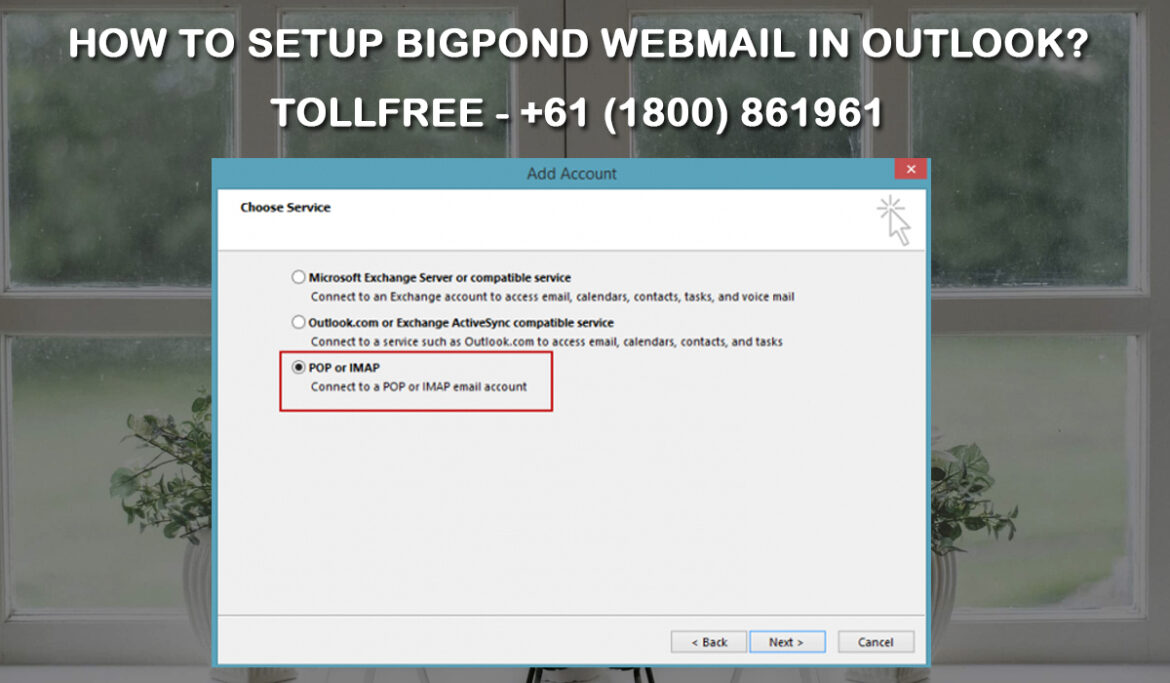
Steps for setting up Bigpond webmail in Microsoft Outlook 2019
- First launch Microsoft Outlook 2019 from the system
- On the left side, look for the options button and click on it. Their user will find Account Setting.
- After clicking on Account Setting, select on New on the account menu and click on options for email.
- Then the user will have to set up the configuration according to the server. Once the user has completed the process, click Next.
- Then comes the section where the user will have to select the email service, click on the check box for Internet email.
- Enter the username, and the entered username will be sent with all outgoing mails user send. Don’t forget to add the email provided by Telstra Webmail.
- Make changes to the server information as required.
- Finally, after following the steps, the setup will be completed.
Some of the users might not feel comfortable following the steps. If users are not able to set up their account, Bigpond Customer Service will assist users with further detailed steps.