Being genuine users, all of us would always look for an application that is best at its service. There are hundreds of software available on the market but not all of them work as we want. The main requirement of good software would consist of good security, the interface is easy to use, the user would not have to call support again and again for making simple changes in the application. From the very old days, we have been using email services for communicating with other users. And due to its best functionality for delivering the message the software is still at the top and has been loved by millions of users. While choosing email client software, we suggest usersget started with Bigpond webmail. It is one of the most used email clients which is situated in Australia.The email client has all the necessary things which are needed for the software to be complete. It also offers loads of special features which are free to use and users can make good use for completing their daily tasks. If users are interested in learning more about Bigpond mail, we suggest userscontact our Support Service Number.
Now, let’s look at some of the features which areoffered by Bigpond mail, there are loads of featuresthat don’t require any further payment. Once a user creates their account, all of the features will be free to use. Now it is not possible to provide details for every feature, if the user wants to learn abouta particular feature then kindly connect with Technical Support where all necessary details will be provided. For now, we will be looking at a feature where users canconnect their email account to another email client software, the following feature was recently approved and was made possible to go outlive. With the following feature, users will be able to operate multiple email account from a commonplace. Now to go a bit deeper, let check on the process for how users can setup up their Bigpond webmail in Outlook 2019.
In the points given below, we have provided all the necessary steps to make changes. Follow the steps as instructed.
- Users will have to first open Outlook 2019.
- Then head to Info Tab and click on Account Settings
- Click on New to create a new email setup.
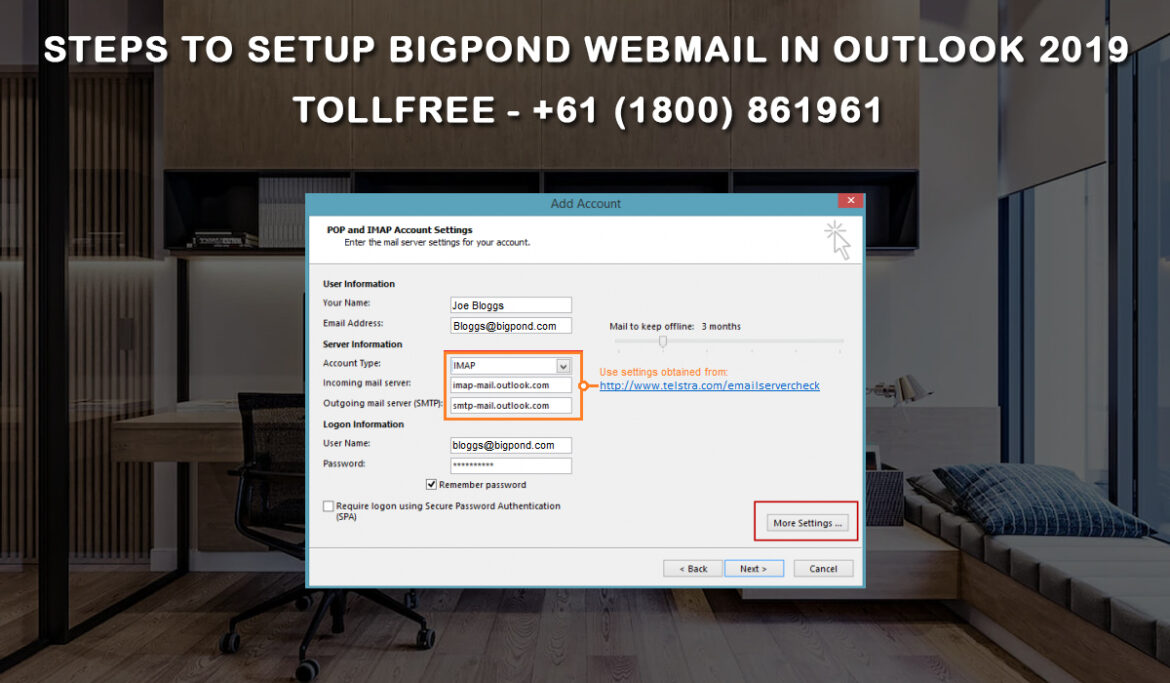
- Users can then click on Manual setup where the IMAP setting should be updated.
- Make sure to also update the server information.
- Click on advanced and check on the server port number.
- Change the Incoming server to 993 (IMAP).
- From the dropdown menu, click on SSL.
- Set the Outgoing server SMTP to 465.
- Click on Ok and click Next.
- Once the process is complete Microsoft Outlook will verify and check on the email settings.
After following the process the setup for Telstra mail will be completed. Users can now operate Telstra and Outlook mail from a common point. If there is any confusion or issue with following the steps then kindly reach out to Bigpond Technical Support.