BigPond is an email service provided by Telstra telecommunications. Given that this is Australia’s largest ISP, we do not doubt that millions of happy customers use its webmail and email services throughout Australia. Your BigPond account can be connected to IMAP, allowing you to access your email from mobile devices and desktop email clients. Desktop email apps might help with getting more work done. They usually have more options, and you can still access your email on your computer even if you aren’t connected to the internet.
Users of BigPond can increase their email productivity by utilizing BigPond’s advanced mailing features. BigPond has a slew of powerful productivity tools, so you can handle all of your daily productivity chores in one place. Other Telstra applications can be managed through your BigPond account. Your BigPond account is where you’ll keep track of all of your online payments. If you want to securely manage your email communication activities, BigPond’s improved security features are what you need.
This article will lead you through adding a Telstra email account to Outlook, including the server names and numbers you’ll need.
- Open Outlook, then head over to Info, then go to Account Settings.
- Choose New to create a new email setup.
- Choosethe ‘Manual configuration or other server types‘ option and then click on Next after that.
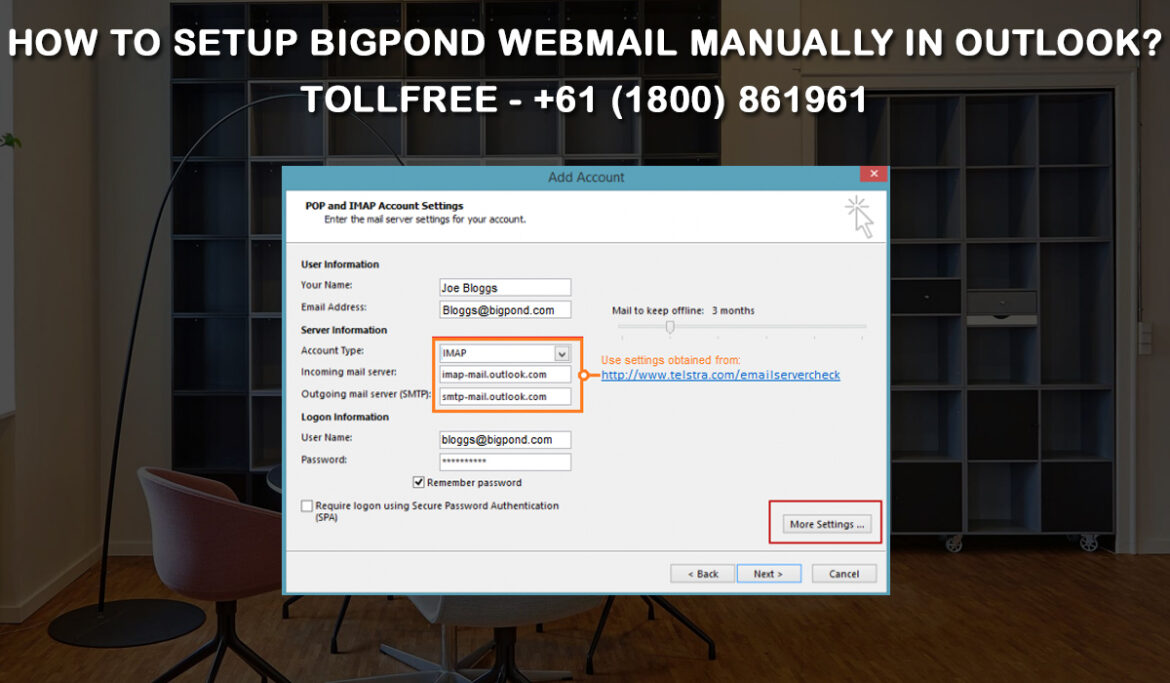
- Select IMAP, and then click on Next and enter the following details correctly:
- Enter your name and Telstra email address in the User details field.
- Enter your Telstra email address and password in the login information box.
- Uncheck ‘Log on using Secure Password Authentication (SPA).
- Update the server information:
- Type IMAP into the box labeled Account type.
- Enter the following in the Incoming Mail Server (IMAP) field: imap.telstra.com
- Enter smtp.telstra.com as the outgoing mail server (SMTP).
- Enter the following in Mail to keep it offline: User-defined (all by default)
- Select More Settings.
- Select the Outgoing Server tab.
- Make sure that you check the box that says, “My outgoing server SMTP requires authentication.”
- Make certain that “Use same settings as my incoming mail server” is chosen.
- Select Advanced and type the following in the Server Port Numbers field:
- Enter 993 as the Incoming Server (IMAP).
- Select SSL from the “Use the following type of encrypted connection”drop-down box.
- Enter 465 as the Outgoing Server (SMTP)
- Select SSL from the “Use the following type of encrypted connection” drop-down box.
- Click on Ok, and then on Next.
After the last step, your BigPond Telstra webmail account should hopefully be set up on your Outlook. If you are unable to set up the account manually, do not hesitate to contact our Bigpond Technical Support team so that they can guide you through the entire setup process till its completion.